Categories
Latest Posts

BACKING UP

Backing up digital files is especially important if you are a photo enthusiast. A sensible and regular backup routine is essential if you don’t want to suffer the gut-wrenching feeling when your computer starts behaving erratically as the hard drive makes strange noises and dies.

Hard drives consist of rapidly spinning platters and moving armatures that can fail mechanically at any time. They usually come with a 12 month warrantee and have a life expectancy of about five years, so you can either back up or keep your fingers crossed. Here’s a few tips that you may find useful …


An easy backup strategy

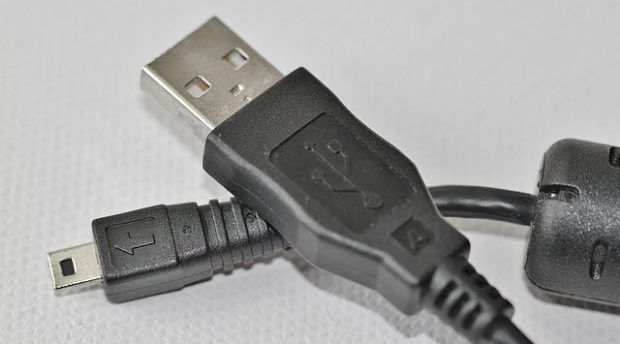
Download the pictures from the camera to your computer using a USB cable, or use a memory card reader plugged into the computer.

Download all of your pictures onto a computer and into folders with an appropriate name or date. Keep all of these folders an “Archive” folder. Back up your entire computer with a Time Machine application onto at least one external hard drive and store this in a safe place.

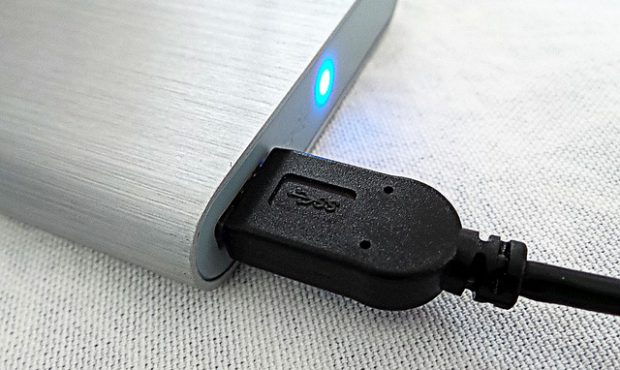
If your computer has a large capacity hard drive you could store all of your pictures there. But it’s very important to backup this archive onto one, or preferably two, external hard drives: The easiest way to backup is by using Mac’s built-in Time Machine, or Comodo Time Machine for PC – these programs will automatically make periodic backups of your entire computer onto the external drive.

If you have only one external hard drive then don’t leave it connected to the computer – both could be stolen or damaged by fire, etc. Connect it to the computer at regular intervals, perhaps once a week, and after backing up store it in a safe place.

It’s much better to have two external drives –  you can can leave one connected to the computer and store the other in a safe place, then swap them over at regular intervals, weekly or monthly, so that theft, fire or water, etc won’t wipe out your entire archive in one go.

Personally I use remarkably small and convenient 2TB external hard drives that cost under $90 each (Seagate Backup Plus Slim). Two terabytes is a lot of storage space and should serve you well into the future.


Memory card backup

Many dSLRs now have two memory card slots. I configure the second card to act as a backup so I’m protected if one card fails, either partially or totally. I buy only cameras that have dual card slots.

To keep the cards in a digitally healthy condition they must be occasionally formatted using the “Format Card” function found in the cameras menu. Formatting erases the cards so be sure to download images you want to keep beforehand.


My own backup routine

I manually transfer pictures that I’ve finished working on to a master external hard drive. I clone identical copies of this onto two other hard drives using Carbon Copy Cloner and store one of the drives in a remote location .

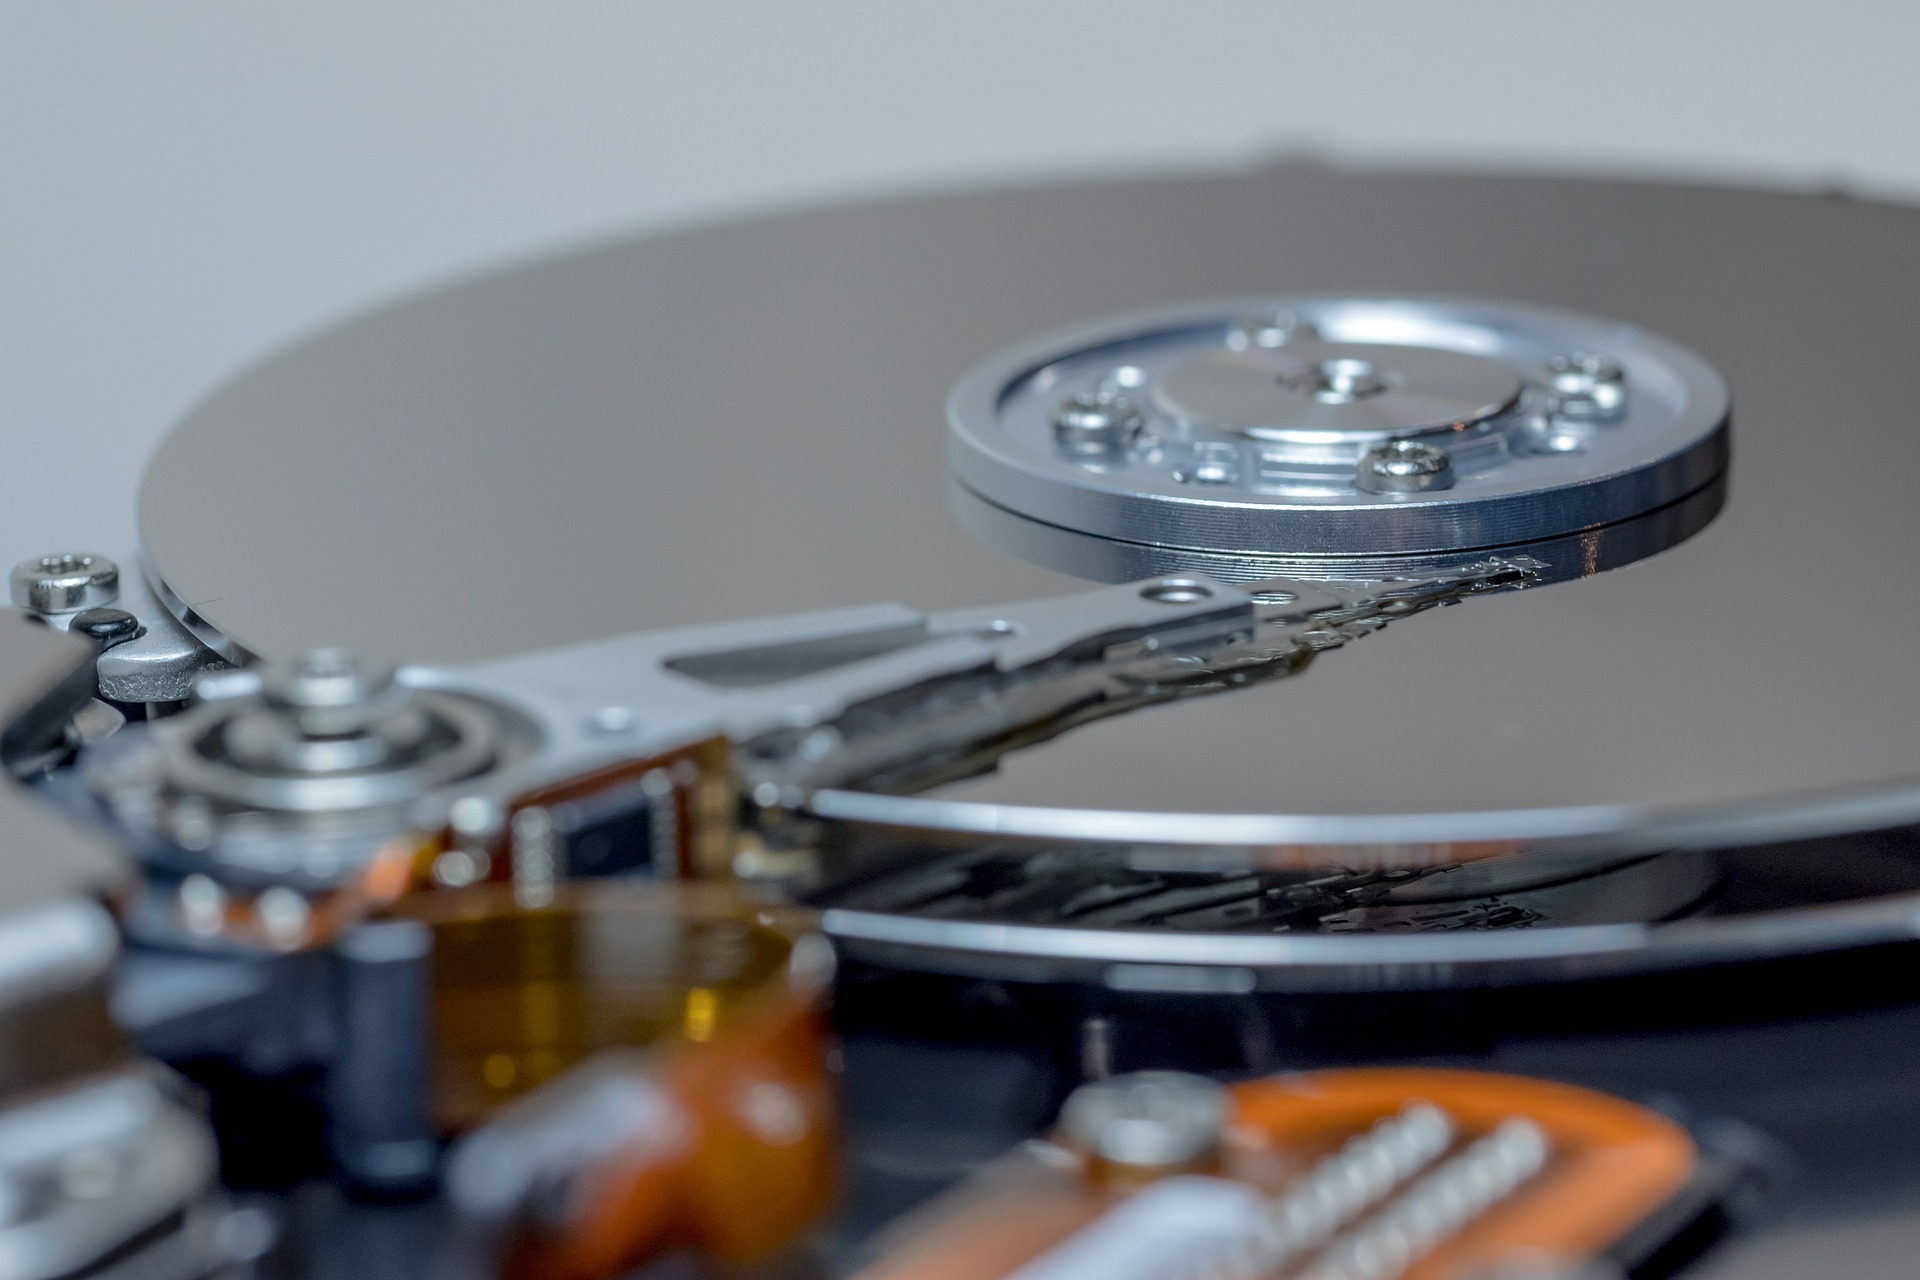
I recently dropped one of my 2TB external hard drives containing thousands of pictures onto the floor from waist height. I immediately connected it to my laptop to see if it had been damaged. It was a complete write off, made unusual noises and was not even recognised by the computer.

Specialist firms can recover data from broken drives, but this is expensive and probably many pictures would still be irretrievably lost. Fortunately the drive that I dropped was one of the three identical backups that I keep updated with my latest work.

After editing pictures on my Mac laptop I periodically transfer them manually to a master external hard drive. Then I use the excellent application Carbon Copy Cloner to backup the new work onto two other external hard drives. PC users could try Todo Backup Free. Having three identical copies of recent work is essential for my peace of mind.

I periodically backup my laptop to another external drive using Time Machine. This protects the images I’m presently working on. You could try Comodo Time Machine if you have a PC.


Solid State Drives

External Solid State Drives, SSDs, are now available that use flash storage. Some years ago SSDs had a poor record for reliability, but modern ones are incredibly robust. They have no moving parts and are virtually indestructible – I saw one dropped from the third story of a building onto concrete and it still worked perfectly.

SSDs are also expected to last about 20 years, or possibly much longer, making them far more suitable and reliable for backing up your photographic archive: Normal hard drives have a life expectancy of only about five years, if you are lucky. Unfortunately SSDs cost, at 2016 prices, about eight times the price of the more fragile traditional hard drives. As soon as the price drops to a reasonable level I will buy a few of these and transfer all of my archive to them.

They are also blazingly fast. I just tested the speed of my Macbook Pro, which has an internal SSD: I double-clicked on a 380MB picture file, containing many layers – it took only four seconds to open both Photoshop and the picture! That’s incredibly fast!

Many computers , especially gaming PCs, are now available that have both an internal SSD and a normal hard drive: The smaller and more expensive SSD holds the operating system and memory hungry games, which both open quickly. The larger, slower and cheaper normal hard drive is used for storage.


And finally…

To be absolutely sure your photographs will last forever you will need to protect them against acts of God, or at least the sun …

In 1859 a massive solar storm took out the entire telegraph network of Europe and North America, causing fires and giving the operators electric shocks. More recently a large solar storm caused the 1989 blackout in Quebec. And in July 2012 a massive solar flare ejected a billion-ton cloud of super heated plasma that only narrowly missed the Earth: Had it hit, it could have fried all of your digital files!

Coronal mass ejections, as they are technically called, can happen again at any time. Storing each backup drive in a static shielding bag will protect them from the Apocalypse. I’m going to order a few so I’ll be able to get a good nights sleep at last.

(I am not affiliated in any way with items mentioned in this article: Those that I use I can highly recommend. I did a little research to find the products to suggest for PC users, but best check them out yourself.)

Categories
Photography Courses

PHOTOSHOP for PHOTOGRAPHERS COURSE

Learn basic Photoshop skills to turn your OK shots into wonderful pictures.

Discover the lost art of creatively bringing your pictures to life.

Course consists of 5 weekly sessions, 10am – 12.30pm.

Topics:

Introduction to Photoshop

Simplifying the Photoshop workspace so that you will be able to find your way around and use the easiest, yet most effective tools.

Introducing Adjustment Layers to help to bring your pictures alive.


The Heart of Photoshop

Introducing Layers and Layer Masks, the most powerful tools in Photoshop, made easy.


Tidying Up

Using the healing and cloning tools. Portrait retouching. Removing distracting objects and details

Demonstrating the use of a digital brush and tablet


Colouring, Sharpening, Softening, Sharing

Colour correction, sharpening and blurring. Saving pictures for the web, email, or printing


Unleashing Creativity

Using your imagination to creatively combine two or more pictures, Blending and modifying


Reviewing the course material
 
This is a very practical, hands-on course, and there will be fun exercises between the sessions.

Bring a laptop with a recent version of Photoshop, CS2 or later.

It’s more convenient, but not essential, to use a mouse rather than the trackpad.
NB: Photoshop Elements is not suitable for this course.

Venue/Dates to be announced.
Join my newsletter for upcoming dates – see sidebar.
Cost: 750NIS
Further info, ring Tom 052 8012 817
Categories
Latest Posts

TELLING A STORY

Recently I needed to take a picture of a colleague during a keynote speech. A good picture is one that tells a story, and in the case of his Powerpoint presentation this required three elements – a good expression and gesture, an appropriate slide on the screen, and some indication of an attentive audience

Unfortunately these three elements refused occur at the same time in a single frame. Undaunted, I took a picture of a suitable expression, a separate picture of the screen, and a picture just of the audience.

Afterwards I combined these three pictures together to create the picture I would have taken had circumstanced permitted.


Three pictures …

TWL_4423-A

Here’s a shot I wanted to use of a suitable expression. The speaker was standing away from the screen, so I left space in the area he’s gesturing towards to add the screen and the audience later.


TWL_4421-B

I took a snap of the slide that would best illustrate the nature of his presentation.


TWL_4422-C

And took this picture, specifically to use just three heads on the far right.


Later I used Photoshop to craft this composite picture which tells the story I would have captured in camera had it actually happened!

TWL_4423-D

To complete the photo-realistic effect I also gave the impression of light on his hand and the shadow this would have cast on the screen.


Practice

To combine pictures together realistically is very enjoyable and not particularly difficult, but it does require lots of practice and experience. If this interests you, then get a full copy of Photoshop, as Photoshop Elements is not suitable.

You will also need a Wacom tablet and pen: This is a pressure-sensitive digital “brush” that is absolutely essential for this kind of work as most high-quality retouching requires careful hand painting with the digital brush.

There are plenty of tutorials on the Internet that will amaze you with clever techniques and shortcut methods of combining pictures together. These can be useful, but also search for down-to-earth demonstrations of how to use Layer Masks and Adjustment Layers – this is how to unleash the real power of Photoshop when used with a digital brush.


Carrying on the tradition

Composite example

Combining several images into one picture is nothing new: Painters, of course, have been doing this for centuries. Photography was invented in 1826 and one of  the first composite images was made by Henry Peach Robinson in 1858. He printed five negatives together to make this beautiful and haunting picture to tell a complete story in a single frame.

Today we carry on this tradition using the remarkably convenient methods of digital editing. Combining images to tell the story is great fun (as long as you are not a photojournalist), which is why I developed my two complimentary careers of photographer and digital artist.

I occasionally give short Photoshop for Photographer courses, details here …

Categories
Latest Posts

TURNING PROFESSIONAL

Occasionally I’m asked if becoming a professional photographer would be a good career choice. I have to answer that it all depends: Photography is a very rewarding hobby, but as a profession it can be very challenging in many ways.

With the benefit of hindsight, here’s a few tips that you may find useful to develop your own career.

Assisting

The best time to start a photography career is before you have any serious financial commitments – for most of us this is before we have a family. The best way to learn the business is by working as an assistant to a variety professional photographers. Initially you may have to work for free, or for low wages.

Assisting is an invaluable way to gain work experience that will serve you well in the future. You need to have a reasonable knowledge of basic photography, and a friendly personality. When interviewed don’t make the mistake of showing the photographer your portfolio – you are applying to assist, not to shoot, so impress by your willingness to be helpful, committed and professional.

I took this shot during a presentation at my local networking group. Opportunities like this give you the freedom to practice creating good results in diverse circumstances without the pressure of making a professional commitment.

Are you ready

If you already have a career but would love to develop photography as a secondary business it may not be possible to take the assisting route. I’d still advise you, however, to occasionally assist different professional photographers to experience a variety of techniques, attitudes and business methods.

Before you start charging for your services it’s a good idea to find simple assignments that test your ability to take good pictures for other people: You could offer to shoot family events, take shots for a local school or a friends website, etc.

And seek out opportunities that take you outside your comfort zone: Photography is the sort of business that no matter how well you prepare in advance there will always be challenging circumstances to deal with. When you feel confident of producing good pictures, even in unfavourable conditions, you’ll be ready to take on professional assignments.

Challenges

DSC_4688
Working quickly under pressure and creating good results is often required in professional photography.

I took this shot early in my career for a fashion spread in a bridal-ware magazine. I was not very experienced at the time and had to solve several problems on the spot while under pressure.

We were in the corridor of a luxury boat with very little space to set up and to work in. It was shot on transparency film so I didn’t have the luxury of being able to Photoshop it afterwards: I had to light it, direct the model, and make sure the exposure and composition were spot on because how it came out of the camera was how it would be printed.

I set up flash lighting in softboxes on each side of the model and took a quick test shot. The exposure hadn’t recorded the soft glow of the lamps so I had to lower the shutter speed, then alter the aperture and flash-power combination while the Art Director looked over my shoulder expecting results.

This is typical of the sort of pressures that crop up when working professionally in different situations. The good news is that for each difficulty you overcome your confidence will grow. Eventually it becomes a pleasure to accept more challenging work because you can guarantee excellent results.

Backup!

It’s pretty obvious, but worth mentioning, that it’s vital to have backups of all your essential equipment. Double check that everything works perfectly and take nothing for granted. Always have on hand a second camera, lenses, memory cards, batteries, speedlights, etc, etc. Blaming equipment is not an excuse for failing to create professional results.

I heard of a photographer who discovered, after shooting an important event, that his memory card had failed to record any pictures. He had to pay an enormous amount of money to restage the entire event and reshoot it. So please take care!

Marketing

Unfortunately experience, technique and creativity are not a recipe for success in the photography business: Marketing, promoting, networking and making good connections are at least as important if you are to succeed in this remarkably competitive profession.

Most pro photographers are freelancers and have to find their own clients. This can be a very precarious way to make a living unless you are happy to spend most of your time and energy on creating new business. Unfortunately photographers agents are not interested in finding jobs for struggling freelancers – they are there to help successful people handle even more work.

The bottom line is: Don’t give up your day job until you can’t afford to keep it!

Categories
Latest Posts

AN INEXPENSIVE SPEEDLIGHT

As you develop an interest in photography you will outgrow the limitations of your camera’s pop-up flash and may decide to buy a speedlight.

This will give you a whole range of creative possibilities but costs around $300 or more for a mid-rage model from a major brand. Independent makes from China are only a third or quarter of the price, but are they a worthwhile investment?

I use Nikon SB700 speedlights for all of my event photography and they are extremely reliable, but I also own several inexpensive Yongnuo flashes from China that cost less than a third of the price of my Nikon flashes.


The Yongnuo 568EX

A few years ago Yongnuo had a reputation for making cheap, unreliable speedlights, but today they offer well-made flashes with advanced features. I recently bought two 568EXs that cost only $101 each and have been reviewed positively in Internet reviews.

Their solid build inspires confidence: They look just about as well made as my Nikon SB700s.


YN568EX Features

HSS on sunny day
Yongnuo’s 568EX High Speed Sync used to take this picture at about 1/2000sec at F2.8 on a sunny day. The fill flash has lightened the shadow side of the face which would have been as dark as the Buddha had no flash been used.

High Speed Sync: The 568EX is the cheapest speedlight to have a High Speed Sync (HHS), or Focal Plane (FP) mode. This allows you to shoot with flash at all shutter speeds – ordinary speedlights can’t be used with shutter speeds faster than about 1/200th or 1/250th sec (the camera’s flash sync speed).

Shooting portraits using a wide aperture, such as F2.8, blurs the background and helps to make the subject more prominent. In sunny conditions, however, you might need to use a high shutter speed of 1/2000th second or even faster. The 568EX allows you to use fill flash at these high speeds to even out the skin tones and lighten shadows. This is a useful feature to have on hand when shooting outdoors at social events.

High shutter speeds capture less of the flash light so you can’t be too far away from the subject for the effect to work. You will need to experiment to see what best suits your particular camera, lens and 568EX combination.

Wireless Command Mode:  Some Nikon and Canon cameras have a wireless command mode. You can place one or more 568EX speedlights away from the camera and when you take a picture their flash output will be automatically controlled by the cameras TTL (through the lens) metering. There are two models, the YN560EX and YC560EX, compatible with Nikon and Canon cameras respectively.

Softbox 2
A small, portable softbox and light stand

Power output: I was pleasantly surprised when I checked the flash power of the Yongnuo 568EX. It’s about 2/3 of a stop more powerful than my SB 700s. (The power may vary slightly between units.) This makes it useful to use with light modifiers such as a softbox or photo umbrella: These diffuse the light over a larger area to give softer, even lighting that’s especially useful for portraits.

Diffusing flash can reduce the amount of light reaching the subject by about 1.5 stops, so the extra power from the Yongnuo makes it a good choice to experiment with studio-style lighting.

Manual mode: It’s very easy to adjust the power output of the 568EX manually yourself. This is very useful when shooting studio-style portraits where you need the light to be constant between shots.

Studio-style lighting: I took this portrait in a small apartment against a white wall. A single YN568EX was fired into a smallish softbox (55 x 70cm) on a lighting stand, about 2 meters in front of the subject. It was in Manual mode and set at about half power. I attached it to a small radio slave which was triggered by a similar unit on the cameras hotshoe. (The radio triggers I used were also made by Yongnuo and are quite inexpensive.)

TLP_0522
A simple portrait using just two speedlights, one in a softbox in front of the subject at head height, and one just behind him to light the white wall. A white reflector, just out of the shot at waist level also helped to soften the light.

A second speedlight was placed behind the subject on a small light stand at about waist level. It was set on manual 1/8th power to light the background. It was triggered by its built-in optical slave to fire in sync with the main flash.

I placed a horizontal white reflector in front of the subject at waist level, to bounce light up and help to produce an even, soft light. You could use a large sheet of white card supported by two chairs, or even a table covered with white cloth.

My camera was on manual mode, 1/160sec at F 7.1, ISO 200. If I had taken a shot at these settings, without using any flash, it would be almost black and hardly record any of the available light: So this brightly lit portrait was completely illuminated by the light from just these two inexpensive speedlights.

If you are new to studio lighting using flash, here’s a tip: Play about with the speedlights – try altering their positions, distances and heights, etc. Keep adjusting their power manually until you find an arrangement that works for you. Use them in the optical slave mode to fire in sync with the cameras pop-up flash. But set the pop-up flash to a low power on manual so that it triggers the main flashes but doesn’t drown out their effect.

It’s best to learn by experience and experiment rather than rules and set lighting setups. To get the right exposure use your camera in manual mode, then adjust the power of the flashes, or the lens aperture, or the manual ISO setting. The best lighting is the one that works best for you. See also Quick Professional Portraits …

Travelling light: If I’m shooting a short portrait / location session I like to travel light, so I’ll carry a just few speedlights instead of heavier studio strobes. I might set up some flashes on light stands, bounced into umbrellas or used inside a softbox, etc.

They can all be triggered from the on-camera flash, and if they are knocked over I’d rather loose a $100 Yongnuo than a $350 Nikon flashgun.

rocker switch YN568EX
It’s quick and easy to increase the flash power of the 568EX using the rocker switch – much easier than with the SB700s menu system. Here the power has been increased by one stop.

Flash Exposure Compensation: When you use the 568EX on your camera the default mode is through the lens (TTL) fill flash. This means that it will try to give just enough light to illuminate the subject. Sometimes it can give too much or too little flash and you have to adjust the power manually. You can do this quickly and easily using the rocker switch on the 568EX – the SB700s use the menu which is more fiddly to use.

LCD backlight: The 568EX has a separate button to turn on a bright orange backlight that I find much clearer and easier to use than Nikons SB700s dim green LCD screen. This doesn’t sound too big a deal until you need to change a setting in a hurry and under pressure in dark conditions – so it’s a feature that I really appreciate.


Reservations

The Yongnuo 568EX is a powerful speedlight that gives you a lot for a small outlay, but how does it compare to my trusted and more expensive Nikon SB700s?

Flash Coverage: The 568EX flash head zooms from only 24mm to 105mm. I often shoot at the 18mm end of my zoom lens when shooting events. When mounted on the camera the YN568EX can’t fully cover the frame at 18mm – corners of the picture lit by flash can be darker. In real-world use, however, you probably wouldn’t notice the flash falloff in most pictures. It does have a pullout diffuser, however, to spread the light and give enough cover for shorter focal length lenses.

The Nikon SB700 has a wider zoom range so doesn’t have this problem whether used with half-frame or full-frame DSLRs, so I’ve never had to use its diffuser.

Sleep Mode: The Yongnuo’s sleep mode is quite basic: You are able to adjust how long it’s idle before entering sleep mode, but after sleeping for a while it unfortunately switches itself completely off. It takes a few seconds to switch back on again and be ready to fire. If you shoot fast moving events even a short delay can make you miss important shots: I would turn off the sleep mode if you use it for events.

The SB700 has a more sophisticate sleep mode that does not switch itself off during sleep mode and wakes up instantly when you touch the shutter button of your camera, so you are always ready to shoot.

Recycle time: At full power, using freshly recharged NiMH batteries, the 568EX recycles in about 3 seconds, which is fast and similar to the SB700. It takes almost 2 seconds to recharge at half power – which is slow compared to the Nikon speedlight that recharges almost immediately. To be fair, it is a more powerful speedlight. Recharging times become important when you need to shoot quickly to capture fleeting expressions.

Underexposure: The YN568EX gives similar results to a SB700 when used for TTL fill flash on my Nikon cameras with the flash head pointing forward. But when angled upwards and used for bounced flash it can underexpose by a stop or more. Fortunately it’s easy to compensate by increasing the power using the rear rocker switch .

Flash head angle: Unlike the SB700, the Yongnuo flash head does not have a button to lock it into position. You can easily knock the head to point slightly downwards which is not ideal if you are shooting portraits and think the head is pointing forwards.

To capture fleeting expressions in changing conditions I need to rely on my SB700 speedlights …

Recomendation

I bought two 568EXs and have a third, more basic Yongnuo model. I’d recommend them if you are buying a first speedlight on a budget, want a back-up flash, need some powerful units for simple studio-style work, want to experiment with HSS/FP fill flash, or would like to try out remote off-camera TTL lighting with Nikon or Canon cameras that have a Commander mode. Yongnuo also make a variety speedlights, but for a modest price the 568EX has a good range of features and is a solidly built choice.

For professional event work, where I have to shoot quickly in a variety of circumstances, I would stick to my Nikon speedlights for on-camera fill flash which give more reliable results. But for more leisurely photography the Yongnuo will be more than adequate for most peoples needs.

To gain confidence using flash in different situations requires lots of practice. Third party items, such as these Yongnuo flashes, will reduce your initial outlay and may encourage you to experiment, increase you knowledge of photography, and even have some fun.

PS: I updated this post in March 2016, so if you are are thinking of buying one, google Yongnuo to see if they have released newer models that better suit your needs.

Categories
Latest Posts

CHOOSING THE RIGHT SOFTWARE

If you are a keen photographer it’s very important that you choose the right software to catalogue and edit your digital photographs.

Your photography and digital skills will develop over time so it’s best to start using software that you won’t outgrow: The best programs have steep learning curves but you can start using them on a fairly basic level, and go deeper into them as your photography matures.

TWL_9320-100
This is the original Raw. It’s a small detail form a shot taken on a dark night with fill flash. Just a few quick clicks in Lightroom transformed it into the shot at the beginning of this article.

Lightroom

Most enthusiasts and professional photographers now rely on Adobe Lightroom. You can arrange your shots into catalogues which are easy to browse through and keep track of your pictures. It’s also a superb Raw file editor giving you maximum control over the look and quality of your images. If you shoot only Jpegs I would still recommend using Lightroom because most keen photographers eventually change over to shooting Raw. More about Raw files

LR can be used to import pictures from cameras or storage cards into folders on your computer – each folder can have its own catalogue. It can also create catalogues of pictures stored onto external storage drives allowing you to browse through all of your pictures whether or not they are held on your computer or archived elsewhere.

Although LR can be used to edit jpegs, it gives its most outstanding results with Raw files. You can make overall adjustments of each pictures exposure, contrast, shadow and highlight detail, grain and sharpness, etc, and also make local adjustments over selected areas of the image. For many enthusiasts LR is the only program they will need to use.

I recommend Julieanne Kost’s LR tutorials which are clear and concise – google “Adobe TV” to find them.

Photoshop

Photoshop is the other main program that I recommend you check out. Photographers often use LR to do the initial preparation and then switch over to Photoshop’s more advanced features to finish editing their photographs.

I would avoid using Photoshop Elements as you could easily outgrow its limited feature set and have to change over to the full version anyway.

Bride-and-Groom-original
This shot will need to be edited in Lightroom to brighten the figures and darken the steps. Then opened in Photoshop to remove to remove the distractions and add a little interest to the sky, etc.

Learning to use Photoshop effectively takes an awful lot of practice, so I suggest you don’t waste your time following the many Internet tutorials about the semi-automated “wow” features that Adobe has stuffed into it.

The power of Photoshop lies in the Layers Palette: You will need to understand how to use layers and layer masks. Study adjustment layers, especially the Curves Adjustment Layers, and learn how to use basic blending modes.

The Clone Stamp and Healing Brush are two of the most powerful tools to master – it’s important to use these with a digital brush, such as the inexpensive “Wacom Intuos ‘Photo’ Pen and Touch Graphics Tablet, small”. 

There’s an amazing assortment of special brushes, but for basic photographic work I just one simple circular brush and constantly alter the size, hardness, and pressure sensitivity as I work on my pictures.

Bride-and-Groom-retouched
The finished picture. After opening in Photoshop all of the editing was done in the Layers Pallet using layers, layer masks, blending modes, the clone stamp and the healing brush tools.

Unfortunately I haven’t found any set of Internet tutorials that I can recommend to learn the basics of Photoshop. I’m not planning to make any myself, but I occasionally give short Photoshop for Photographers Courses – you can always get in touch if you’re interested.

The learning curve

I use Lightroom and Photoshop every day and couldn’t do without them. They both have steep learning curves which is why I recommend that you start using them at the simplest of levels and gradually develop your knowledge and skill as required.

There are alternative programs you may prefer but make sure they have all the features you might need to use in the future. Otherwise you be starting the learning curve all over again with Lightroom and Photoshop.

Categories
Latest Posts

A SHOT IN THE DARK

Have you ever tried to take decent photographs of children playing in an unlit farmers field on a moonless night?

I had volunteered to photograph an evening school event: The venue turned out to be a large farm field peppered with groups of children enjoying various sports activities. Flashlights were being used because the only illumination was given by street lamps along a road at the bottom of the field.

TWL_2780

Manual mode

In my other articles about shooting in low light situations you’ll see that I normally use manual mode to give me full control over the exposure: I set the aperture, shutter speed and ISO to capture enough background detail and use a dedicated hot shoe flashgun, set to auto, to light people in the foreground.

I set my DSLR to manual mode, 1/100sec, with my zoom lens open at its widest aperture. I used manual ISO at 2000, which is about as high as I will use for shots of people since higher ISOs make the hair look clumpy and loose fine detail.

Even though it was so dark in the field I didn’t want to use a faster prime lens since I had to move quickly between different groups of children and needed the flexibility of a zoom. I kept the shutter speed as high as I could in order to minimise blurred shots .

TWL_2912

A few quick test shots confirmed this gave just enough exposure to capture the street lighting, but could not capture detail of any part of the field that the flash couldn’t reach.

It’s important to realise that shots taken with flash are a combination of two exposures, ambient and flash. My manual setup exposed for what little ambient light was available in the background, and the flashgun used the aperture and ISO values to calculate sufficient light to expose the children in the foreground.

One benefit of shooting in the dark is that the flash would freeze most of the action even though I was using a shutter speed of only 1/100sec.

A simple trick

It was so dark that any shots with only the field in the background would have looked like snaps – with black, featureless backgrounds and brightly lit people in the foreground. So I used the simplest of tricks to liven up the pictures and shot from angles that included the road as a background element in of most of the pictures.

TWL_2833

TWL_2833 copy
If I had not included the road in the background the picture would have looked flat like this. Depth definitely adds interest.

Back to Basics

One thing I love about photography is the unexpected challenges that arise almost every time I take out my camera. It’s unusual to shoot in such very dark conditions and you certainly cannot rely on scene modes, or other exposure modes, to help in these situations like this. It’s definitely sensible to have a good working knowledge of the basics of exposure and understand how important backgrounds are to the success of a picture.

Digital cameras are stuffed with clever features but you will be at an embarrassing disadvantage if you rely on them too much.

TWL_2757
Including even a small area of the street lighting adds depth to liven up this shot.

For more examples of shooting in low light situations see these other articles:

Shooting in low light using flash

Shooting in low light without flash


Categories
Photography Courses

CREATIVE PHOTOGRAPHY COURSE

FOR BEGINNERS AND ENTHUSIASTS.

Please join Newsletter for details. Courses in Pardes Hanna, Tel Aviv, Netanya.

5 weekly sessions, 9am – 11.30am.

Whether you are a beginner or an experienced enthusiast, this course will help you take the next step to being more creative with your camera. This is a fun, practical, hands-on course.

[slideshow_deploy id=’4682’]

You’ll practice simple exercises to help unlock your creativity and take more interesting pictures. We’ll look at how photographers have used different ways of thinking and looking at the world.

Tom Langford is a professional photographer who loves to share his knowledge and enjoyment of photography.

Registration,  Tom: 052 8012 817

Venu: Karkur, Pardes Hanna

Cost: 650NIS

Categories
Latest Posts

SHOOTING IN LOW LIGHT, WITHOUT FLASH

Shooting an event in low light without flash is quite a challenge, especially if you don’t have an expensive full-frame camera and a few wide apertures lenses.

If you have a more modest kit, such as a half-frame (APS-C or DX) camera and a cheaper zoom lens, you can still get good results by applying a little knowhow and using some sensible techniques.

On a recent shoot of the singer, Yael Feldman, in an intimate and dimly lit venue, I tested the popular half-frame Nikon D7100 DSLR camera and Nikon 18-200mm, F3.5 – F5.6 zoom lens. Here’s a few tips that might help you in a similar situation …

TWL_2035

Hair, Flash and ISO

My first consideration was choosing the highest ISO that would still give adequate detail. High ISOs make hair look muddy, have grainy shadows, and loose fine detail. With the D7100 the maximum ISO I would use when shooting people is 1600. Lower ISOs are preferable, but require slower shutter speeds in low light.

I would have liked to use a flash gun, set to manual and half power, on a lighting stand a few meters in front of the stage. This would have been triggered using a radio transmitter on the camera’s hot shoe, and a receiver on the flash gun. I could have then used a lower ISO, but, as this was a small venue, flash would have been too intrusive.


The Venue and Raw files

The venue had a narrow, dimly lit stage with extremely limited space to shoot from at the front and to one side. As I like to shoot fast and intuitively, the 18-200mm zoom would give me the flexibility I needed.

The light was bluish at the centre of the stage and yellowish at either side, so I set the D7100 to save my shots as Raw files. This is absolutely essential in situations like this as Raw files record far more information than Jpegs. They can be processed in Adobe Lightroom to give you a wonderful amount of control over highlights, shadows, sharpness, grain, exposure and white balance.

Lightroom is the best way to process large numbers of shots, especially if groups of pictures share similar lighting. If you shoot more modest quantities, the free Adobe Camera Raw plugin for Photoshop does the same job, but is slower to use

TWL_2081


Camera settings

I set the camera to Manual mode, with both the white balance and ISO on Auto. The ISO was set to a maxim of 1600.

I set the 18-200mm lens to F3.5, its widest aperture at 18mm. The aperture varies when zoomed, but stays at its widest aperture throughout the zoom range. This lens gives good, sharp pictures wide open, especially at the shorter focal lengths I would be using.

I made a few quick test shots and found that speeds of around 1/60sec produced slightly dark but acceptable exposures. I judged this from looking at both the display and the histogram to check that I would not loose too much shadow detail.

I knew that the ISO would probably say at 1600 for all of the shots, but in the unlikely event of the light briefly brightening, the Auto ISO setting would prevent over exposure.

TWL_2090


Sharp shooting

The 18-200mm zoom lens has Image Stabilisation, but it’s important to realise that this cannot stop blur caused by movements of the singer. Since I would be shooting at fairly slow speeds, I would have to carefully time my exposures, whenever possible, to coincide with still points in the performance. For instance, if she raised her hand or threw back her head I would shoot just at the moment of stillness in the action.

Image stabilisation does, however, help to minimise blur cause by camera movement, but I would still take the precaution of bracing myself and the camera whenever possible.

Back button focussing


Back button focusing, recomposing, and breath control

Like many photographers I use back button focusing: This is a custom menu setting that transfers the focusing function to the button nearest my right thumb: Instead of half-pressing the shutter button to focus, a quick tap on the back button now is now used to focus.

The D7100 has several autofocus modes: I used the “AF-S mode” – one press both focusses and locks the focus.

Using the back button to pre-focus means that there is virtually no shutter lag when pressing the shutter button to take a shot. I’m more likely to catch the important still points in the singers performance using this technique.

I set the autofocus Area Mode to “Single Point”: In the viewfinder there is now only a single focusing point that can be moved around the screen and positioned over the singers face. A quick tap on the back button locks the focus. I can then recompose and press the regular shutter button when I wish to take a shot.

I frequently focus-and-recompose and also take two or three shots to ensure at least one of them will be sharp. I also briefly hold my breath as I press the shutter button to help minimise camera shake.

Techniques like these may seem laborious, but they work, and with practice become completely instinctive.

TWL_2384


Results

Despite low light levels, most of the shots were sharp and responded well to processing in Lightroom. I further edited a few shots in Photoshop – Lightroom is very useful for bulk processing but not as capable at Photoshop when individual pictures need more careful and detailed work.

The combination of the Nikon D7100 and 18-200 zoom was a pleasure to use and gave excellent results. Even with the annoying focus assist beam switched off it had no trouble focussing quickly and accurately. I had a good selection pictures to send to Yael who was very appreciative of the results.

Categories
Latest Posts

QUICK PROFESSIONAL PORTRAITS

Here’s how to take quick professional portraits in 5 minutes with a minimum of fuss. You will need a digital SLR, two flashguns, a compact light stand and a square of white material.

I developed this method to take on-the-spot portraits for delegates after conferences when time and space was in short supply. Here’s how …

Set up as in the sketch. The background flash is at waist level, just behind the subject, pointing to the white material. It’s set to Manual, at 1/16th power.

It’s optical slave ignores preflashes from the cameras flashgun so that it is triggered only by the main flash. This is called the “SU4” mode for the Nikon SB700s that I use.

The flash on the camera is in normal TTL mode, but boosted by about 2 stops using the flash exposure compensation setting.

Use the camera in Manual mode, 1/160th sec, F5.6, ISO 400, and save the pictures as Raw files. Raw files give you plenty of control over both the shadows and highlights when you process the shots later.

Position the subject in front of the light stand, and take a test shot. Adjust the light on the subject by increasing or decreasing the exposure compensation of the cameras flashgun.

That’s all there is to it. A few poses and two minutes later you can pack up, or shoot the next subject.

This method is very fast to use – what takes time is becoming familiar enough with your equipment to set it up without fussing. I have an SB700 permanently set to SU4 mode, manual 1/16 power, so that I can quickly set up the background flash. If your camera has a memory bank, use it to instantly switch to the manual settings.

This setup work for me, but you may have to experiment with your own equipment to get the best results..

Professional speakers will pose naturally, but lesser mortals will appreciate a little direction and encouragement. Ask them to stand with one shoulder slightly towards the camera, then to turn with the other shoulder forward so that you take shots from both sides of their faces.

I took this portrait using a similar setup in a small apartment. The white wall was lit by a flashgun directly behind the subject. I placed the other flashgun into a softbox on a lighting stand, slightly higher than my head height and a little to the right. I used it on manual, about 1/2 power and used a radio trigger on the camera to fire it.

Softboxes give a more flattering and even illumination: I use them when there’s time and space to setup and shoot.

It’s very important that you feel relaxed and confident when taking portraits. If you are preoccupied and fussing with equipment the subject will sense your discomfort and it will show in the portrait. So practice setting up your gear until it becomes second nature.

Portraits are fun: By helping your subjects to enjoy themselves you’ll get the best results.


Back to Blog …

Categories
Latest Posts

KISS YOUR CAMERA

Modern digital cameras have become so complicated that it’s difficult to know what features are really important. The glut of menus, settings and technical terms can be so intimidating that it’s easy to think the more you understand the camera, the better you pictures will be. Big mistake.

The digital revolution only started 15 years ago, until then film cameras had simple controls, were easy to understand, and didn’t get in the way of taking pictures.

This advanced film SLR, from the 1980s, was easy to use and has only a few fundamental controls that fall easily to hand.

My advice is to learn the fundamental controls of your digital camera and leave the bells and whistles to the snappers. By mastering the basics you will feel in control and not be intimidated by all of the “advanced” features: You can concentrated on what’s important, taking good pictures.

Kiss your camera

Keep It Simple, Silly, is excellent advice, especially when it comes to using digital cameras. Did you know that most pros use only a fraction of what’s stuffed into their dSLRs.

Since every exposure you’ll ever take is a combination of aperture, depth of field, shutter speed, ISO and exposure compensation, it’s sensible to understand what they are how they interact. It’s hardly rocket science, and once you are familiar with what’s important in different situations your camera will become just a tool.

In this situation I placed the focusing area exactly where I wanted it. There simply isn’t enough time to trust the cameras autofocus choices.

I use eitheAv
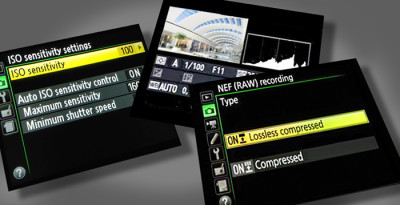
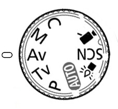
r the Aperture Priority or Manual modes for most of my professional photography. I don’t have a use for the clever autofocus modes but rely on a single focusing square that can be moved around the screen. I use Auto ISO unless it’s important to switch to manual and I tweak the brightness using Exposure Compensation.

For a practical example of Aperture Priority mode (A or Av), see Zoom the Background Trick, and Manual mode, see Event Photography in Low Light.


Scene modes 

Scene modes are meant for snappers. Rather than play about with them I advise you to find out what they actually do: For instance, Beach or Snow mode simply increases the exposure compensation by about 1.5 stops to make the pictures brighter. Obviously it’s easy to alter the exposure compensation yourself and then you’ll feel in control of what you are doing.

Landscape mode selects a smaller aperture which makes both the background and foreground in focus. Portrait mode selects a larger aperture which makes the background more out of focus. Sports mode selects a fast shutter speed to freeze the action.

These modes are as boring to mention as they are to use. If you want to enjoy and get more satisfaction from your photography don’t use scene modes, use your head!

The Internet is the best way to learn about these topics – much better than wading through the camera manual.


Useful digital features

Most of the essential features I’ve mentioned are common to both film and digital cameras. Some of the useful features that digital has added are: Auto ISO, Raw files, instant playback (with histograms) and image stabilisation.

More about shooting Raw – Raw Files, and the software I suggest you check out – Choosing the right software. 

Nikon-settings

When I first became a professional photographer in London, I used to hire expensive camera and lighting equipment for each job. I’ll never forget the first time I hired the Mamiya RZ 67, a large medium format film camera. Never having used it before I asked the sales assistant how to use it. It took two minutes for him to explain and for me to understand all I needed to know.

When I bought my first dSLR I studied it in depth for three weeks, not because I was interested in all it could do, I simply needed to be prepared to handle any problems if it went wrong!

I hope these notes will help to simplify all the clutter stuffed inside your camera and help you to use it as a tool.


How to take good pictures

Being in control of your camera, however, won’t help you to take good pictures. Creating photographs that are interesting to more than just family and friends requires an entirely different set of skills.

Fortunately anyone can take a good photograph – all it requires is a little vision and a lot of practice. Check out How To Take Good Pictures for details of the 5 steps that will help you on your way.


Back to Blog …

Categories
Latest Posts

ZOOM THE BACKGROUND TRICK

Have you ever wondered how to take portraits with artistic out-of-focus backgrounds?

Professional photographers use expensive cameras and lenses to easily create blurred backgrounds: If you are an enthusiast with a less expensive dSLR (with a half frame sensor) and an average quality long zoom lens, you can still take professional-looking portraits with blurred backgrounds.

You will need to know the Zoom-the-Background trick. Here’s how it works…

Categories
Latest Posts

SHOOTING IN LOW LIGHT, USING FLASH

I love shooting corporate events, weddings, Bar Mitzvahs, etc, because no two are the same. They throw up challenges and problems that keep me on my photographic toes – they’re great fun and satisfying to shoot. Here’s a few tips you might find useful, especially for using flash in low light situations …

Categories
Latest Posts

RAW FILES

Have you tried shooting in Raw? Digital cameras record pictures as Jpegs by default, but most also offer the option to record your pictures as Raw files. Many enthusiasts and most professional photographers now shoot in Raw because it extends the capabilities of the camera and is the best choice for editing and improving pictures afterwards.

Categories
Photography Courses

BEGINNERS/IMPROVERS PHOTOGRAPHY COURSE

For beginners and experienced photographers who want to improve and take more creative pictures. Learn and practice how to take amazing pictures.

5 weekly sessions of 2 ½ hours each, 10 – 12.30am

Course Topics

The 5 steps to taking good pictures (details here…)
Essential camera settings, menus, modes, file types
Developing visual awareness
Using your camera more effectively and creatively
A brief history of photography
Telling a story with your pictures
Taking pictures of children, tips and tricks
Using your imagination to improve a picture
Assessing the strengths and weaknesses of your pictures
Making basic improvements to your pictures in the computer
Keeping track of your digital pictures
Emailing pictures
Sharing your pictures on the Web

There will be practical exercises during the course and fun assignments between sessions.

Any digital camera can be used, compact or SLR.
You will need access to a computer with a basic photo editing program such as Picasa (download free from Google).
Venue/Dates to be announced.
Join my newsletter for upcoming dates – see sidebar.
Registration, or further info, ring Tom: 052 8012 817
Cost: 700NIS
Categories
Uncategorized

Oshine – a Creative Multipurpose WordPress theme

Detracto erroribus et mea. Malorum temporibus vix ex. Ius ad iudico labores dissentiunt. In eruditi volumus nec nibh blandit deseruisse ne nec, vocibus albucius maluisset ex usu.

Categories
Uncategorized

If You Are Good At Something, Don’t Do It For Free

Malorum temporibus vix ex.Ius ad iudico labores dissentiunt. In eruditi volumus nec, nibh blandit deseruisse ne nec, vocibus albucius maluisset ex usu.

Categories
Uncategorized

Woocommerce, WPML, Master Slider and much more

Nihil quaeque moderatius quo ut, eu vix noster fierent postulant. Est ut magna tation, nec timeam tractatos dissentiunt id, ne integre albucius eam. Animal docendi efficiantur ut eam.

Categories
Uncategorized

Twelve Stunning and Unique Demos

Lorem ipsum dolor sit amet, ocurreret assentior sit id, et nam impetus numquam. Detracto erroribus et mea. Malorum temporibus vix ex.

Categories
Uncategorized

Its hard not to flaunt when you do stuff like this

Malorum temporibus vix ex.Ius ad iudico labores dissentiunt. In eruditi volumus nec, nibh blandit deseruisse ne nec, vocibus albucius maluisset ex usu.